Sometimes just little things can reduce the joy we get from our tractors, like a throttle lever that won’t stay in the position we want. I’ve heard some say as long as it runs good, don’t whine and that is true. But we get used to having things nice and working properly, so when something doesn’t work like it should, some of us find it annoying.
On the Waterloo numbered tractors, a friction disk was used to keep the throttle lever in the position we wanted it to be and hold the engine speed we wanted. After decades of use, these friction disks will eventually wear out and the throttle will no longer stay where we set it. Fortunately, the cure is an easy fix.
If your throttle lever won’t stay at the position you want it to, your first step is to try and adjust the spring tension on the friction disk to see if that will cure your problem. In this case, the friction material was worn away and no amount of adjusting would hold the throttle lever where you wanted it to be. On this John Deere 70, we can simply remove the four dash bolts to gain access to the adjusting bolt located on the back side of the throttle lever (Photo 1). If your friction disk is still serviceable, you can tighten the adjusting bolt, which will increase the pressure against the friction disk and hopefully cure your issue of the throttle lever not staying where you put it.

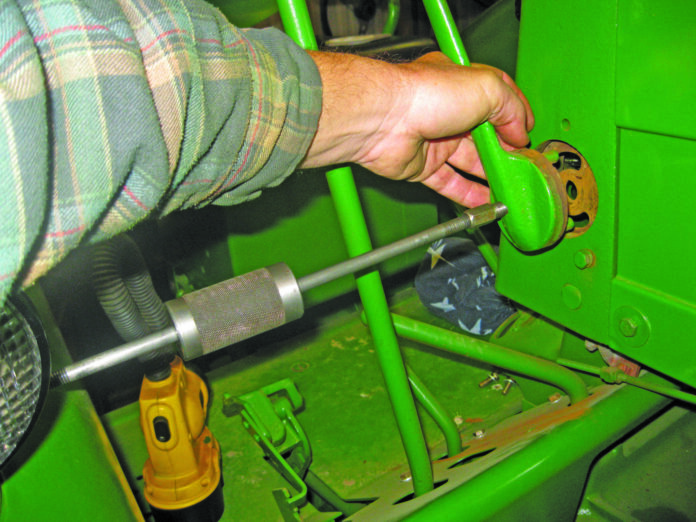
If adjusting the friction disk pressure does not cure your problem or if the friction disk is just plain worn out, you can easily replace it. With the dash removed for access, remove the adjusting bolt, spring and washers (Photo 2). You can access this bolt without removing the dash if you wish; it will just be a little bit harder to get the job done, but you can get it done this way. Once the spring tension adjusting bolt is removed, in theory the throttle lever should just pull out from the side of the dash support. However, in most cases, the two pins that go through the operating disk on the back side (as seen in Photo 2), which operates the throttle rod attached to the governor spring, will not want to pull back through this plate. Since the 7/16ths inch adjusting bolt has been removed from the back side of the throttle lever (Photo 2), this leaves the threads in the throttle lever available to use a small slide hammer. With a small slide hammer threaded into the throttle lever, you can pull the throttle lever with the two pins back through the operating plate.


Now that the throttle lever is removed, we can remove the three 5/16ths inch friction disk retaining bolts. The old friction disk can now be removed (Photo 6). We are now ready to install the new friction disk (Photo 7). Place the new friction disk behind the dash support and secure it using the three 5/16ths inch bolts. Use a fine grit sandpaper and clean the rust off the two throttle lever pins before trying to reassemble the throttle lever. The two throttle lever pins are a tight fit in the operating disk, so you might only be able to just get them started into the holes of the operating disk (. A little trick here is to use a 7/16ths inch bolt and washer to pull the throttle lever pins through the operating disk once the new friction disk is in place. The pins should come through without using a lot of torque on the pulling bolt. If the pins will not come through the operating disk using a small amount of torque on the pulling bolt, then reclean the pins with sandpaper to remove any and all rust, then try it again.

With the throttle pins completely through the operating disk, we can remove the pulling bolt, then reinstall the adjusting bolt, tension spring and washers (Photo 11). Adjust the spring tension so the throttle lever will hold in any position you put it in with the engine running. And finally to button up this little project, reinstall the dash panel, jump on your tractor and go have a great time!


